Showing posts with label Main Dishes. Show all posts

Friday, March 6, 2015

Roasted Chicken Broth - Pressure Canned

Oven roasted a chicken for Sunday lunch.

I then poured some more water, right into the roasting pan, in with the broth and bones. Added a splash of Apple Cider Vinegar to help leach the nutrients from the bones into the broth. And put the roaster with the lid on, on the wood stove to simmer.

After a day or so of simmering, I had a lovely rich, rich, brown broth.

The broth could simply have been frozen. But instead I chose to can it. Being low-acid it must be pressure canned. Our altitude requires some adjusting for. Your Pressure Canner's instructions will tell you how much you need to adjust for your altitude.


Jars and lids must be sterile and hot for a good seal.

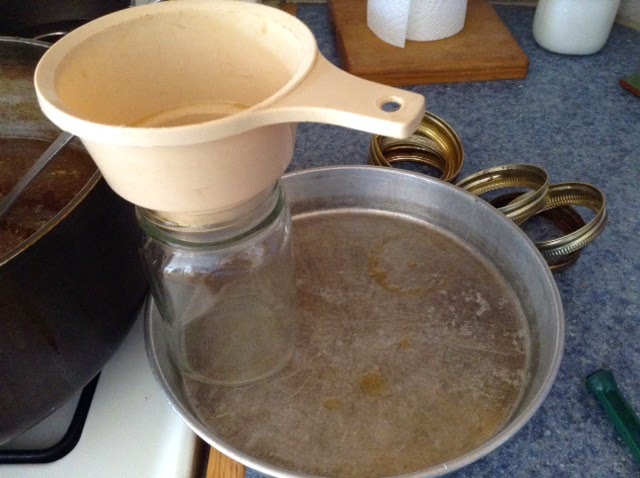
Here is a tip I learned from Grandma Ruth-put a pan under your jar to catch the drips.

Leave the proper head-space at the top of the jar. One inch.
Ladle hot broth into hot jars.

Load and then vent the canner per instructions for the particular canner you are using.

Process. Be sure to allow the pressure to fully release before opening.

Remove jars and allow them to return to room temperature. Often then need a quick wipe or wash. Label. And store in a cool, dry preferably dark room.

Friday, June 27, 2014

Brining Your Own Bacon

In an effort to control the quality of our meat a bit more. We have taken to buy some pork, brining it, then having my dad smoke it for bacon. We like to use boneless rib meat for bacon slices-rashers. Loin will give you more of a Canadian Bacon end product. Loin also needs to be in the brine longer because of the thickness of the cut.

Per 1 pound of meat

Mix:
1 Tbsp Tenderquick
1 tsp packed brown sugar
1 tsp maple syrup (the real stuff)
Granulated Garlic to taste-I use about 1 tsp per 6 lbs meat
Coarsely ground Black Pepper

Rubbing brine mix on pork pieces.

Mix the above in your brine container. Your container needs to be glass or plastic and to have a lid.
Rub your mix onto your meat. Layer meat into your container. Place lid on. Put container in refrigerator. Turn meat pieces daily.

Pieces on left next mix rubbed on. Pieces on right already rubbed.

Age about 10 days. This will depend on the thickness of your meat cuts. I did 10 days for the above-boneless pork rib meat. It is better to go a little longer than to have too little time in the brine.

Don't forget to label.
Rinse before smoke-curing.

Thursday, February 20, 2014

Free Books to Help with Traditional Cultured Foods

Need some help learning about traditional cultured foods? Cultures for Health has several free books (down-loads) available.


They walk you through ingredients, safety, basic steps, and include many recipes.

I think the Kefir "Book" was the first I received. I enjoy the Kefir ice cream recipe! It includes dairy and water kefir recipes.


Other books, I've received are: Cheesemaking, Kombucha, Lacto-Fermentation, Sourdough, and Yogurt. I choose to print the books out and keep them in a large Three-ring binder.

To receive these wonderful resources go to the bottom of Cultures for Health's home page and sign-up. They are free and there is also a free newsletter. An easy and free resource to improve your health!


Monday, January 27, 2014

Homemade Chicken (or Turkey) Soup-canned

Last Fall to make room for the in-coming Game meat and quarter beef, I used Simply Canning's recipe for Chicken Soup.

It was so good, I thought I'd try it this week with the bits and pieces from a Turkey I roasted on Sunday and some broth I made from the bones.


This is so convenient heat to a boil, add noodles or cooked rice and finish cooking. Serve.

Link: Homemade Chicken Soup

This is a very simple recipe, but you do need a Pressure Canner to can it.
It could be frozen too. The veggies would be softer after freezing though.

Tuesday, October 15, 2013

Breakfast Sausage

This recipe works well with game meat.

For 30# meat:
1/2 cup salt (I used coarse Light Grey Celtic Sea Salt)
3/4 cup brown sugar
1/2 cup dried sage
3 Tbsp coarse Pepper
2 Tbsp Cayenne Pepper

Mix into the meat pieces and then grind to get the best flavor distribution.
You can mix the seasoning together and then use 1 Tbsp per pound of meat for smaller batches.

To fix-I make a "hamburger" type patty and fry on a fairly low setting in a pan rubbed with coconut oil. We also use it crumbled and cooked part way on pizza. If you cook it all the way before putting it on the pizza it will be too dry when the pizza is done.

Friday, March 1, 2013

Real Food Learning-GNOWFGLINS

I've been learning all kinds of interesting information over at GNOWFGLINS from Wardee.To join in follow my link If five friends sign-up, I'll receive a free video!


Monday, October 29, 2012

Vanilla Ricotta Pie

This is nice for breakfast or brunch. Plan to make it ahead as it needs to cool and then sit in the refrigerator at least overnight. Plan to double it for 12 to 14 servings and cook it in a large spring-form pan.


Oven 350°F

Crust:

Mix in medium bowl:
1 1/4 cup flour
1/2 tsp baking powder
1/8 tsp salt
2 Tbsp sugar
Cut in 1/4 cup cold unsalted butter

Mix together in a measuring cup with spout:
1 slightly beaten egg
2 Tbsp whole milk
1/4 tsp vanilla

Stir into flour mixture. Work dough into a smooth ball. Roll out to about 1/8" thick between two sheets of wax paper or parchment paper. Fit into a small spring-form pan or a 8"-9" layer cake pan. Place in refrigerator to chill while mixing filling.

Filling:

With electric mixer or egg beater mix until smooth and creamy:
3 eggs, beaten
3/4 cup sugar
1/4 tsp salt
1 lb ricotta cheese-if using whey ricotta I add about 1 Tbsp cream also
1 Tbsp vanilla

Ladle filling into pan. Bake for almost 60 minutes. (If doubling it will take about 10 minutes longer.) Filling should be firm on the edges and pliant in the center. Completely cool on rack at room temperature. Center of pie will sink slightly. Refrigerate at least 8 hours before serving. Serves 6-8.


Wednesday, October 19, 2011

Enchiledia Pie

A very versatile dish. Bake it in a dutch oven, casserole, or your crock-pot.

Ingredients:
12 corn tortillas
1 can enchiledia  sauce
1 lb. ground meat
1/4 lb. shredded cheese
chopped onion and olives (optional)
Softened butter

1. Brown ground meat in skillet with onion if using.

2. Spread a small amount of butter on one side of three tortillas. Lay buttered side down in bottom of pan, casserole or crock-pot.

3. Place 1/3 of the ground meat mixture on top of tortillas and pour 1/3 of the enchiledia sauce on top of the meat and 1/3 of olives if using.

4. Repeat steps 2 and 3 twice, saving about 2 Tbsp of sauce for step 5.

5. Top with last three tortillas. Pour last of sauce on top and sprinkle shredded cheese. Cover.

6. Bake at 350° for about 25-30 minutes, until hot and bubbly. Cook in crock-pot until hot and bubbly.

Thursday, January 7, 2010

Steak Marinade


Elk Steaks in Marinade

This marinade is based off one by Kim Cahill in "No Guesswork Cooking" an excellent cookbook, especially if you ever do large groups. For 10 pounds of boneless steaks (beef or game):

3/4 cup olive oiil
6 Tbsp. lemon juice
3 Tbsp. worcestershire sauce
6 Tbsp. Soy Sauce-low sodium
3/4 tsp. liquid smoke (probably not necessary if you use flavored chips on your grill)
6 cloves of minced garlic or equivalent of granulated garlic
1 1/2 Tbsp. chili powder
1 1/2 tsp. coarse ground pepper
3/4 tsp. onion powder

Mix and pour above over rinsed meat. Cover and marinate in refrigerator for 24 hours!

Grill to desired doness.

I recommend brining your steaks first. See post Meat Brine

Tuesday, January 5, 2010

Meat Brine


Elk Steaks in Brine

This brine works well on red meats. I use it often on beef and game steaks. It helps the meat take on your marinade and tenderizes.

For 10 pounds of boneless steak I mix 9 cups lukewarm water and 3/4 cup of canning salt. Pour over meat. Cover and let the steaks set in refrigerator for just under 3 hours..

Rinse off the brine. Then marinate.

Thursday, October 1, 2009

Easy & Fast Chicken Quesadillas

Take 1 can of canned chicken, drained and mix with Picante Sauce. I use about 3/4 as much Picante Sauce as I do chicken.

Finely shred Colby/Jack cheese. You want 1/2 to 1 cup for each quesadilla you make.

2 flour tortillas per quesadilla

Heat skillet on about medium. Put a small amount of olive oil in the skillet. Layer tortilla, cheese, chicken/picante mix, cheese, tortilla. When tortillas starts to brown. Flip. I use a spatula. Toast/brown the other side. Cheese should melt. Adjust heat to prevent over-browning of tortillas before cheese melts. Drain on paper towels if needed.

Tuesday, February 10, 2009

Game Burrito Meat


A make-over of Mexican Meat Mix from Make-A-Mix Cookery, by Eliason, Karine; Harward, Nevada; Westover, Madeline; HP Books, Tucson, AZ, 1978.

5-8# boneless game roast

Put in large sprayed or greased dutch oven, cover with tight-fitting lid. Bake for 10-12 hours at 200ª until well done.

Separate meat from juice. Cool meat, then shred. Store juice in refrigerator for later use. This will also help the juice to separate from the fat. Remove fat.

In large Dutch oven, sauté 1 large onion, chopped and 4 oz. chopped green chilies or jalapenos, drained, in 2 tablespoons of olive oil. When soft add 24-32 oz. green chili salsa (or other type salsa that you prefer), 1/4-1 tsp. garlic powder, 4 tablespoons flour, 1 tsp. salt, 1-1/2 tsp. cumin. Heat until thickened. Add meat and juices. Simmer until heated through. Freezes well.