Two years ago while visiting a friend, she treated us to "Mexican Carrots" with our lunch. Then she generously shared a copy of her recipe-which she had received from someone else.
The first summer I made a half batch and thought it would be enough for the year. No.
So last summer when the onions and carrots were ripe, I made a full batch thinking it would last the year. No again. It was gone in four months!
So when Azure Standard had a good price on organic carrots, and onions and jalapenos were on sale at the market, I decided it was time to make another batch. We enjoy this as a condiment with our Mexican meals: fajitas, tacos, burritos, and especially taco salad.
Ingredients:
5 lbs. carrots, washed, peeled, sliced on diagonal about 1/4" thick
6 large yellow onions, sliced thin
5 Tbsp olive oil
10 bayleaves
30 cloves of garlic (use more if they are small), peeled, and sliced
5 tsp whole peppercorns
3 Tbsp Mexican Oregano (there is a difference from "regular" oregano)
2 cups Apple Cider Vinegar
10 tsp sea salt
4 cups water
16 oz or about 12 average size jalapeno peppers, de-seeded and sliced.
Equipment:
Glass jars for about 1 1/2 gallons
Non-reactive 8-10 qt stock-pot and large bowl(s)
Sharp knife, mandolin, and/or slicer of some type
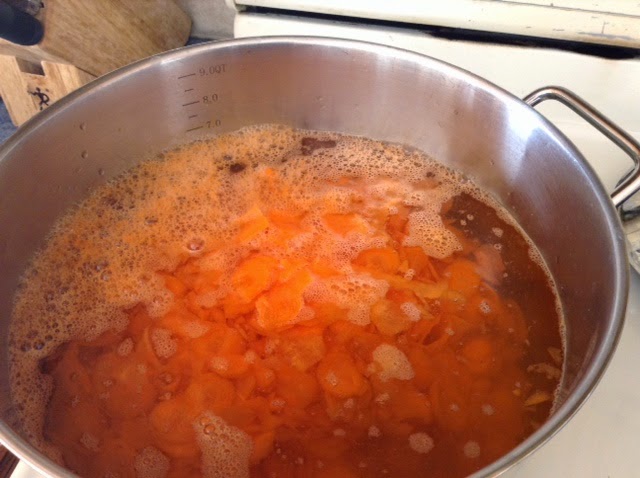
First, prep your carrots–wash, peel, slice. I used the large slicer cone for my Kitchen-Aid mixer and it did a wonderful job. Then bring about 5 qts of water to a boil in your stock-pot.
When water is boiling put in your carrots to blanch for only 2-3 minutes. Do not cook to soft. They are much better crunchy. At the end of the time pour off the boiling water and chill the carrots with ice water.
While carrots cool, prep the onions, garlic, peppers, and other ingredients. Again I used the thin slicer cone for my Kitchen-Aid to speed this up. The peppers I had to do by hand with a sharp chef knife.
Now, we are ready to mix our ingredients together:
Put oil and bay leaves in stock-pot. Saute until oil is infused.
Remove bay leaves. Add other ingredients in this order:
garlic and onion
peppercorns and oregano
jalapenos
Saute for a few minutes
Add vinegar, salt, water. Bring to a boil
Meanwhile put carrots in large bowl. When brine is boiling pour over carrots. Mix well. Let it cool to room temperature.
When at room temperature, scoop and pour into sterilized jar(s). Pour in all the brine to help pickle.
Place in refrigerator. I use the extra fridge in the basement. Let pickle for about 4 weeks-if you can wait that long!
Showing posts with label Cultured. Show all posts
Wednesday, February 25, 2015
Mexican Carrots
Labels:
Cultured,
Food Storage,
Health Through Diet,
Preserving,
Veggies
Wednesday, November 12, 2014
Homemade Granola Bars
Being hunting season, this is a big hit with the hunters. I don't remember where I found the original recipe, but here it is with my tweaks. You do not need to be precise with the ingredient amounts.
Ingredients:
1/2 cup Honey
2/3 cups Peanut Butter
3 cups Granola-I used a homemade soaked granola that was very plain
Your choice of Mix-ins: dried fruit, nuts, coconut, chocolate chips, etc
Butter 9" x 9" pan (or equivalent size)
Heat honey in a heavy sauce pan on medium-low. Let boil one minute. This will make it thick enough to be the glue for holding your granola together.
Stir in the peanut butter. (Personally, I only use *real* peanut butter. You know the kind that is only peanuts and salt!) Mix well.
Next stir in the granola. I turn the heat off after the first cup has been added. Keep mixing until all the granola is coated with the honey-peanut butter.
Now stir in your mix-ins. If you want your chocolate melted throughout mix it in right away. If you want chunks of chocolate, just put the chocolate on top of the mix in the pan immediately before scooping out the granola into the square pan. (Milk chocolate will melt easier than the darker chocolates.)
If you want a layer of goodies on the bottom of your granola bars-put the goodies into your pan before cooking the honey-peanut butter mixture.
Press the mixture firmly into the pan. Cool in refrigerator. Cut into bars (I usually opt for 8-10). Wrap individually in plastic wrap. Keep in refrigerator or freeze.
By running hot water immediately into your pan, clean up will be much easier.
Ingredients:
1/2 cup Honey
2/3 cups Peanut Butter
3 cups Granola-I used a homemade soaked granola that was very plain
Your choice of Mix-ins: dried fruit, nuts, coconut, chocolate chips, etc
Butter 9" x 9" pan (or equivalent size)
Heat honey in a heavy sauce pan on medium-low. Let boil one minute. This will make it thick enough to be the glue for holding your granola together.
Stir in the peanut butter. (Personally, I only use *real* peanut butter. You know the kind that is only peanuts and salt!) Mix well.
Next stir in the granola. I turn the heat off after the first cup has been added. Keep mixing until all the granola is coated with the honey-peanut butter.
If you want a layer of goodies on the bottom of your granola bars-put the goodies into your pan before cooking the honey-peanut butter mixture.
Press the mixture firmly into the pan. Cool in refrigerator. Cut into bars (I usually opt for 8-10). Wrap individually in plastic wrap. Keep in refrigerator or freeze.
By running hot water immediately into your pan, clean up will be much easier.
Monday, June 23, 2014
Sourdough Day
It was a cold, rainy, frosty day here even though it was June.
I already
had the sourdough sponged to make Sourdough Tortillas. This recipe is
from Vintage Remedies: Guide to Bread.
These are easy and light. I can mix them in the morning and roll and
bake just before supper. They have become our favorite tortilla recipe
because of how light and tender they are. I usually use a Spelt-Prairie
Gold-Natural White Flour mix for these. But sometimes I use some Barley
too.
| Using a French Rolling Pin, the tortillas are rolled directly on the counter top. |
![]() |
| Using a cast iron skillet heated to medium, then lowering the temperature. See the air bubbles-they make the tortilla light. |
![]() |
| I stack the tortillas on a cooling rack as they come off the pan. |
![]() |
| Up close to see the air bubbles. |
Our 37th anniversary was the next day, so I wanted a yummy dessert to put in Mr. Wonderful's lunch. The Sourdough Chocolate Cake also from Vintage Remedies: Guide to Bread looked like a healthier choice. It was easy to make and turned out light and moist.
![]() |
| The batter is mixed easily by hand in two steps. |
![]() |
| Poured into the buttered pan, ready to bake. Look at the activity of the sourdough-all those bubbles! |
![]() |
| I chose to just put a glaze on top. |
![]() |
| The crumb is magnificent! |
We also had Sourdough Waffles for breakfast the next morning. There were fresh strawberries from the garden for Mr. Wonderful's waffle.
Sourdough is yummy and healthy!
Labels:
Breads,
Cakes,
Cultured,
Desserts,
Health Through Diet
Thursday, June 19, 2014
Cheddar Curds
| Cheddar Curds on a lunch salad. |
Thursday, February 20, 2014
Free Books to Help with Traditional Cultured Foods
Need some help learning about traditional cultured foods? Cultures for Health has several free books (down-loads) available.
They walk you through ingredients, safety, basic steps, and include many recipes.
I think the Kefir "Book" was the first I received. I enjoy the Kefir ice cream recipe! It includes dairy and water kefir recipes.
Other books, I've received are: Cheesemaking, Kombucha, Lacto-Fermentation, Sourdough, and Yogurt. I choose to print the books out and keep them in a large Three-ring binder.
To receive these wonderful resources go to the bottom of Cultures for Health's home page and sign-up. They are free and there is also a free newsletter. An easy and free resource to improve your health!
They walk you through ingredients, safety, basic steps, and include many recipes.
I think the Kefir "Book" was the first I received. I enjoy the Kefir ice cream recipe! It includes dairy and water kefir recipes.
Other books, I've received are: Cheesemaking, Kombucha, Lacto-Fermentation, Sourdough, and Yogurt. I choose to print the books out and keep them in a large Three-ring binder.
To receive these wonderful resources go to the bottom of Cultures for Health's home page and sign-up. They are free and there is also a free newsletter. An easy and free resource to improve your health!
Labels:
Bread,
Breads,
Cakes,
Candy,
Cheese,
Cookies,
Cultured,
Dairy,
Desserts,
Dip,
Food Storage,
Health Through Diet,
Kefir,
Kitchen Tips,
Main Dishes,
Pies and Pastry,
Preserving,
Salad,
Veggie,
Veggies
Tuesday, October 22, 2013
Greek Yogurt or Yogurt Cheese
Greek Yogurt seems to be all the rage lately.
I've been making a gallon of yogurt a week and turning it into Greek Yogurt.
Simply drain your plain yogurt (to make your own yogurt go here) in a cheesecloth bag or better yet use a nylon paint filter bag.
These bags are a breeze to wash out!
I bought mine at Home Depot.
![]() |
| Yogurt dripping in a 1 gallon nylon paint filter bag. |
Labels:
Cheese,
Cultured,
Dairy,
Desserts,
Health Through Diet,
Kitchen Tips
Saturday, March 30, 2013
Freezer Biscuits for a large crowd
Being in charge of the church's "Easter" breakfast means I'm always on the look-out for a way to serve healthier food to a large crowd. When Money Saving Mom shared making Freezer Biscuits I knew I needed to try it.
I had an old recipe of a Freezer Biscuit that we didn't like, because it was dry and didn't raise well.
The tip of letting the biscuits thaw for an half-hour to hour makes all the difference.
Here is the recipe I'm using:
4 cups flour (I've also done two batches with half pastry wheat flour)
1 cup butter
3 Tbsp. Baking Powder
4 tsp. sugar (if using honey half)
1 tsp. cream of tartar
1 tsp. salt
About 1 1/3 cups buttermilk, milk, kefir
Cut butter into flour. I used my beater to break up the butter well, before turning the mixer on to finish blending the butter in.
Add all other dry ingredients. Mix until a fine crumb.
Stir in buttermilk until just moistened. Depending on your flour and weather you might not need all the buttermilk.
Knead exactly 10 times on well-floured cloth or board. Pat out to about 3/4" thick. Cut with biscuit cutter.
Place on cookie sheet.
Place cookie sheet in freezer. Let freeze. Bag up and keep in freezer.
This size batch makes about 18-20 biscuits.
To Bake:
Preheat oven to 425- 450°F while biscuits are waiting. (The electric ovens at church we used 425°F, my propane oven at home I use 450°F.
Set frozen biscuits on cookie sheet. (I cover with a tea towel.) Wait about 30 minutes to 1 hour then bake at 450°F for about 12 minutes. Because they are still firm when you put them in the oven they will take a little longer than normal biscuits to bake.
I also love that I can take out just a few at a time when it is just 2 or 3 of us here to eat.
I had an old recipe of a Freezer Biscuit that we didn't like, because it was dry and didn't raise well.
The tip of letting the biscuits thaw for an half-hour to hour makes all the difference.
Here is the recipe I'm using:
4 cups flour (I've also done two batches with half pastry wheat flour)
1 cup butter
3 Tbsp. Baking Powder
4 tsp. sugar (if using honey half)
1 tsp. cream of tartar
1 tsp. salt
About 1 1/3 cups buttermilk, milk, kefir
Cut butter into flour. I used my beater to break up the butter well, before turning the mixer on to finish blending the butter in.
Add all other dry ingredients. Mix until a fine crumb.
Stir in buttermilk until just moistened. Depending on your flour and weather you might not need all the buttermilk.
Knead exactly 10 times on well-floured cloth or board. Pat out to about 3/4" thick. Cut with biscuit cutter.
Place on cookie sheet.
Place cookie sheet in freezer. Let freeze. Bag up and keep in freezer.
This size batch makes about 18-20 biscuits.
To Bake:
Preheat oven to 425- 450°F while biscuits are waiting. (The electric ovens at church we used 425°F, my propane oven at home I use 450°F.
Set frozen biscuits on cookie sheet. (I cover with a tea towel.) Wait about 30 minutes to 1 hour then bake at 450°F for about 12 minutes. Because they are still firm when you put them in the oven they will take a little longer than normal biscuits to bake.
I also love that I can take out just a few at a time when it is just 2 or 3 of us here to eat.
Labels:
Breads,
Cultured,
Food Storage,
Health Through Diet,
Kefir
Thursday, March 28, 2013
Flavored Milk Kefir
I've been making my own kefir the last few weeks. Then adding some fruit and sweetener to flavor.
To every cup of kefir I add a handful of frozen fruit and 1/2-1 teaspoon of sweetener-honey, sugar. Stevia does not need as much. Sometimes for more intense flavor I add a spoon of frozen 100% fruit juice concentrate.
Blend.
Delish.
To every cup of kefir I add a handful of frozen fruit and 1/2-1 teaspoon of sweetener-honey, sugar. Stevia does not need as much. Sometimes for more intense flavor I add a spoon of frozen 100% fruit juice concentrate.
Blend.
Delish.
Subscribe to:
Posts (Atom)