Showing posts with label Preserving. Show all posts

Saturday, April 1, 2017

Beef Bacon

To make bacon using beef, instead of using the beefplate for short ribs, use it for "bacon."
It is easier if you have your butcher cut the beefplate in strips the thickness you desire. I forgot this time so I am cutting it in about 1/4" strips with an electric slicer.


Take the slices or you can use the chunk of beefplate whole and later slice it. It is easier to smoke the beefplate before slicing, but your meat will have more flavor if marinated sliced.


Marinate with:
Per pound of meat
1 Tbsp Morton's Tender Quick
1 tsp brown sugar
1 tsp maple syrup

Optional add ins: liquid smoke, black pepper, smoked paprika, turmeric, granulated garlic, chili powder, etc. You determine how "spicy" you like it. This also allows you to make it gluten free.

Place your meat in a glass or plastic container. Rub your marinade mix over the meat. Cover and keep in the refrigerator. Turn daily. Slices should be ready to smoke or use as is in 5 - 7 days. Chunks take about 10 days.


Beef "bacon" will not be as crispy as pork. It works better when wrapping filets or making "Poor Man Filets" (ground meat), because it will cook similarly to the beef it has wrapped.

Friday, March 6, 2015

Roasted Chicken Broth - Pressure Canned

Oven roasted a chicken for Sunday lunch.

I then poured some more water, right into the roasting pan, in with the broth and bones. Added a splash of Apple Cider Vinegar to help leach the nutrients from the bones into the broth. And put the roaster with the lid on, on the wood stove to simmer.

After a day or so of simmering, I had a lovely rich, rich, brown broth.

The broth could simply have been frozen. But instead I chose to can it. Being low-acid it must be pressure canned. Our altitude requires some adjusting for. Your Pressure Canner's instructions will tell you how much you need to adjust for your altitude.


Jars and lids must be sterile and hot for a good seal.

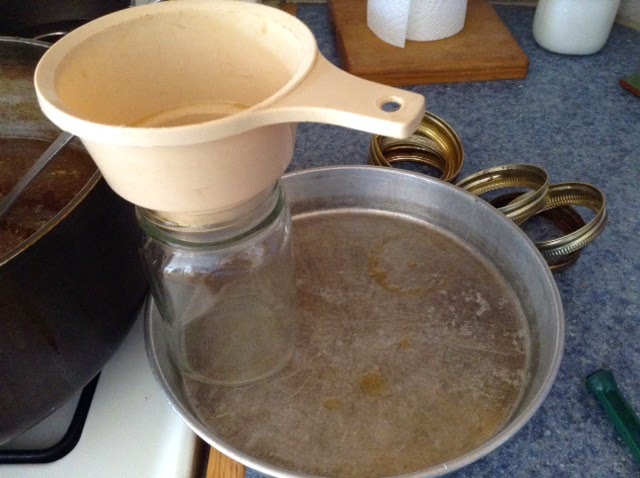
Here is a tip I learned from Grandma Ruth-put a pan under your jar to catch the drips.

Leave the proper head-space at the top of the jar. One inch.
Ladle hot broth into hot jars.

Load and then vent the canner per instructions for the particular canner you are using.

Process. Be sure to allow the pressure to fully release before opening.

Remove jars and allow them to return to room temperature. Often then need a quick wipe or wash. Label. And store in a cool, dry preferably dark room.

Wednesday, February 25, 2015

Mexican Carrots

Two years ago while visiting a friend, she treated us to "Mexican Carrots" with our lunch. Then she generously shared a copy of her recipe-which she had received from someone else.

The first summer I made a half batch and thought it would be enough for the year. No.
So last summer when the onions and carrots were ripe, I made a full batch thinking it would last the year. No again. It was gone in four months!

So when Azure Standard had a good price on organic carrots, and onions and jalapenos were on sale at the market, I decided it was time to make another batch. We enjoy this as a condiment with our Mexican meals: fajitas, tacos, burritos, and especially taco salad.

Ingredients:
5 lbs. carrots, washed, peeled, sliced on diagonal about 1/4" thick
6 large yellow onions, sliced thin
5 Tbsp olive oil
10 bayleaves
30 cloves of garlic (use more if they are small), peeled, and sliced
5 tsp whole peppercorns
3 Tbsp Mexican Oregano (there is a difference from "regular" oregano)
2 cups Apple Cider Vinegar
10 tsp sea salt
4 cups water
16 oz or about 12 average size jalapeno peppers, de-seeded and sliced.

Equipment:
Glass jars for about 1 1/2 gallons
Non-reactive 8-10 qt stock-pot and large bowl(s)
Sharp knife, mandolin, and/or slicer of some type

First, prep your carrots–wash, peel, slice. I used the large slicer cone for my Kitchen-Aid mixer and it did a wonderful job. Then bring about 5 qts of water to a boil in your stock-pot.

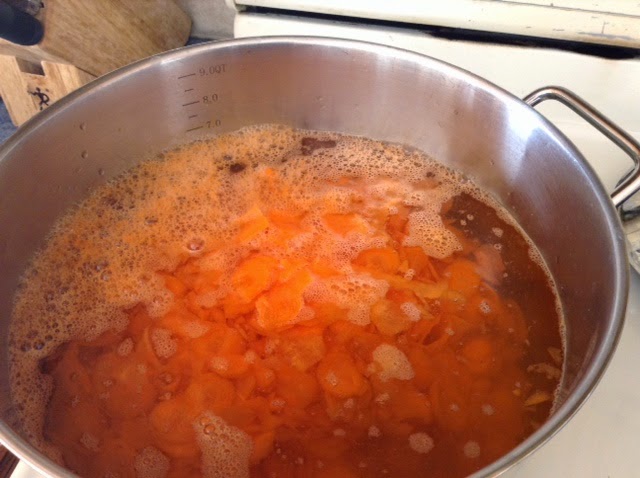
When water is boiling put in your carrots to blanch for only 2-3 minutes. Do not cook to soft. They are much better crunchy. At the end of the time pour off the boiling water and chill the carrots with ice water.

While carrots cool, prep the onions, garlic, peppers, and other ingredients. Again I used the thin slicer cone for my Kitchen-Aid to speed this up. The peppers I had to do by hand with a sharp chef knife.


Now, we are ready to mix our ingredients together:
Put oil and bay leaves in stock-pot. Saute until oil is infused.


Remove bay leaves. Add other ingredients in this order:

garlic and onion
peppercorns and oregano
jalapenos

Saute for a few minutes
Add vinegar, salt, water. Bring to a boil

Meanwhile put carrots in large bowl. When brine is boiling pour over carrots. Mix well. Let it cool to room temperature.

When at room temperature, scoop and pour into sterilized jar(s). Pour in all the brine to help pickle.
 Place in refrigerator. I use the extra fridge in the basement. Let pickle for about 4 weeks-if you can wait that long!




Friday, June 27, 2014

Brining Your Own Bacon

In an effort to control the quality of our meat a bit more. We have taken to buy some pork, brining it, then having my dad smoke it for bacon. We like to use boneless rib meat for bacon slices-rashers. Loin will give you more of a Canadian Bacon end product. Loin also needs to be in the brine longer because of the thickness of the cut.

Per 1 pound of meat

Mix:
1 Tbsp Tenderquick
1 tsp packed brown sugar
1 tsp maple syrup (the real stuff)
Granulated Garlic to taste-I use about 1 tsp per 6 lbs meat
Coarsely ground Black Pepper

Rubbing brine mix on pork pieces.

Mix the above in your brine container. Your container needs to be glass or plastic and to have a lid.
Rub your mix onto your meat. Layer meat into your container. Place lid on. Put container in refrigerator. Turn meat pieces daily.

Pieces on left next mix rubbed on. Pieces on right already rubbed.

Age about 10 days. This will depend on the thickness of your meat cuts. I did 10 days for the above-boneless pork rib meat. It is better to go a little longer than to have too little time in the brine.

Don't forget to label.
Rinse before smoke-curing.

Thursday, February 20, 2014

Free Books to Help with Traditional Cultured Foods

Need some help learning about traditional cultured foods? Cultures for Health has several free books (down-loads) available.


They walk you through ingredients, safety, basic steps, and include many recipes.

I think the Kefir "Book" was the first I received. I enjoy the Kefir ice cream recipe! It includes dairy and water kefir recipes.


Other books, I've received are: Cheesemaking, Kombucha, Lacto-Fermentation, Sourdough, and Yogurt. I choose to print the books out and keep them in a large Three-ring binder.

To receive these wonderful resources go to the bottom of Cultures for Health's home page and sign-up. They are free and there is also a free newsletter. An easy and free resource to improve your health!


Friday, March 1, 2013

Real Food Learning-GNOWFGLINS

I've been learning all kinds of interesting information over at GNOWFGLINS from Wardee.To join in follow my link If five friends sign-up, I'll receive a free video!


Tuesday, December 4, 2012

Canned Pumpkin

I enjoy using  pumpkins to decorate my kitchen in the fall. I simply set them around in out-of-the-way corners on the floor. Maybe with a decorative gourd or two.

After Thanksgiving I process them. The easiest way I've found is to cut the pumpkin in half.
Remove the stem and seeds. A spoon with a sharp edge helps to scoop the seeds out-like an ice cream scoop or large serving spoon.

I then place the halves upside down (skin side up) on silicone sheets on my cookie pans.
Bake at 350°F for about 1 hour. This will depend on the size of pumpkin halves and how full you have your oven. Bake until a fork easily goes through the skin.

Now using a large spoon or ice cream scoop, scoop the flesh out of the skins. This should be easy to do.


Put the pumpkin flesh in a large pot to heat. If your pumpkin is not juicy add a couple tablespoons of water. Once you pot of pumpkin is hot it is ready to fill your canning jars. Can in a Pressure Canner.

A quart jar will make a nice large pumpkin pie.

Tuesday, October 16, 2012

Using your Kitchen-Aid to make Applesauce

If you have the fruit/vegetable strainer attachment for your Kitchen-Aid mixer it is a breeze to make delicious applesauce.

All you need for ingredients are apples-I like to use a variety for better flavor and water!

1. Wash your apples in a produce wash if you think they have any sprays or contamination. If they are just dirty/dusty wash in warm water with a bit of soap. Rinse well

2. Chop apples in quarters. Remove stems. If apples are very large, cut in smaller pieces. They must fit through the shoot on the strainer.

3. In a large pan with a tight lid, put enough water to just about cover the bottom. Fill with your apples. Bring to a boil. It takes about 10-20 minutes depending on the apple type. The apples will get soft and puffy. Dump this pan in a large bowl and start your next pan.

4. I let my apples cool a bit before processing through the fruit/vegetable strainer. The strainer will remove all the peel, seeds and hard bits. This is great for your compost pile. Have a bucket at the end of the strainer to catch the refuse. The applesauce will slide down from the strainer and you will need a bowl underneath to catch it.

5. Put applesauce on stove to get hot again if you are going to can it. If freezing go ahead and put into your containers.


6. Fill clean hot jars with hot applesauce and place hot lids on. Process for your altitude.

Monday, December 5, 2011

Hash Browns for the Freezer

The 8 Yukon Gold potatoes left in storage were starting to grow little sprouts-time to turn them into hash browns.

Wash potatoes. Cut out any spots, sprouts, etc. Slice in half. (Or the size convenient for your shredder.)

Place in large dutch oven with enough water to keep from boiling dry.

Cover and turn on high. Cook on high about 20 minutes. Should come to a boil. Turn off heat and let set a few more minutes. Remove lid and allow potatoes to cool enough to handle.


Run through shredder.


Wrap in plastic wrap in portion size. Here I did approximately 2 cups in plastic wrap. Then bagged the packages to help keep them together in the freezer.

To use: Place frozen or thawed hash browns in hot oil or butter in skillet. Fry. Flip and break up occasionally to ensure cooking thoroughly.

Thursday, December 1, 2011

Pumpkin Experiment

Thanksgiving is over and it is time to deal with the pie pumpkins I picked up at Scoresby's Market for 50 cents each.

Having read about "roasting a pumpkin" to prepare the meat. I decided to try it.


Look at these after just one hour. This method is so much easier.

Wash well. Oil. Pop in the oven. Split open. Remove strings and seeds with ice cream scoop.

Then scoop out the meat for your recipe. Ready to use or freeze.

Monday, September 20, 2010

Dehydrating Fruit

It is canning season here and I've been putting up peaches and pears.


Sometimes you have some prepped fruit left-over, I've found my guys enjoy dried fruit when hunting or traveling.


I simply slice the prepped fruit in 1/4" slices, lay it out on the trays, and let the dehydrator do it's job.